This option makes it easier for users to navigate and you don’t need to worry about accidental touch or click over touchpad when using a USB Mouse. So without wasting any time let’s see How to Automatically disable Touchpad when Mouse is Connected in Windows 10 with the help of the below-listed guide.
Automatically disable Touchpad when Mouse is connected
Make sure to create a restore point just in case something goes wrong.
Automatically disable Touchpad when Mouse is connected Method 1: Disable Touchpad when Mouse is connected via Settings Method 2: Disable Touchpad when Mouse is connected via Mouse Properties Method 3: Disable Dell Touchpad when Mouse is connected Method 4: Disable Touchpad when Mouse is connected via Registry Method 5: Disable Touchpad when Mouse is Connected in Windows 8.1
Method 1: Disable Touchpad when Mouse is connected via Settings
Press Windows Key + I to open Settings then click on Devices.
From the left-hand menu, select Touchpad.
Under Touchpad uncheck “Leave touchpad on when a mouse is connected“.
Reboot your PC to save changes.
Method 2: Disable Touchpad when Mouse is connected via Mouse Properties
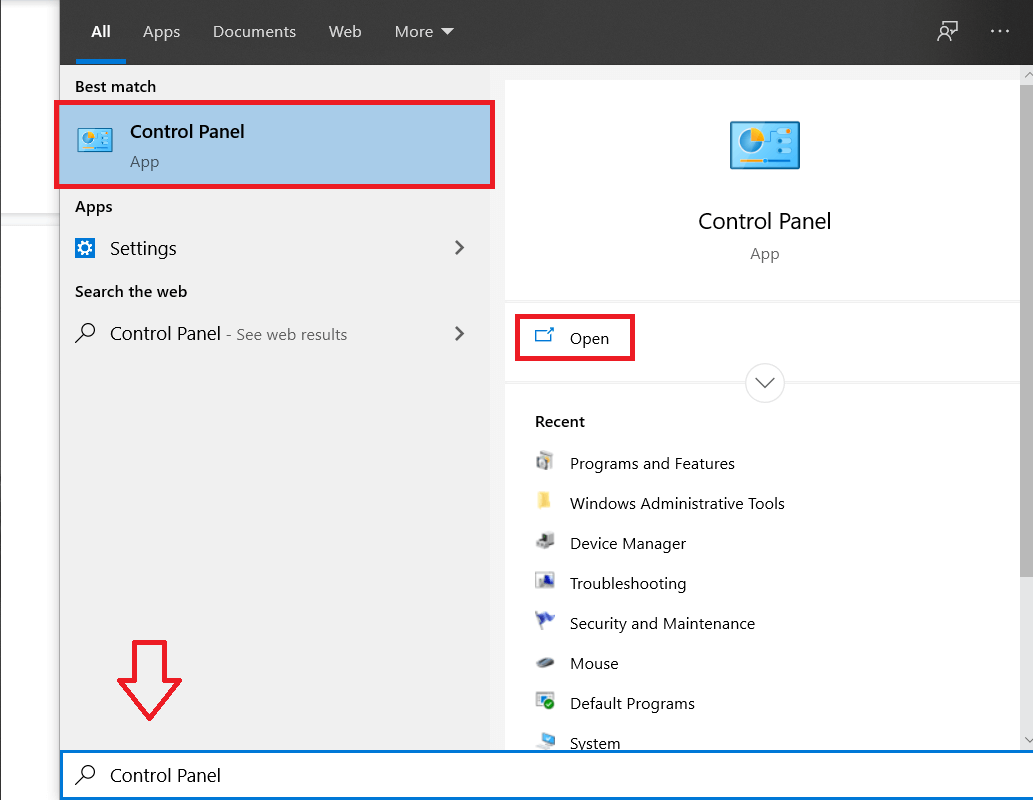
Press Windows Key + Q to bring up Search, type Control, and click on Control Panel from the search results.
Next, click on Hardware and Sound.
Under Devices and Printers click on Mouse.
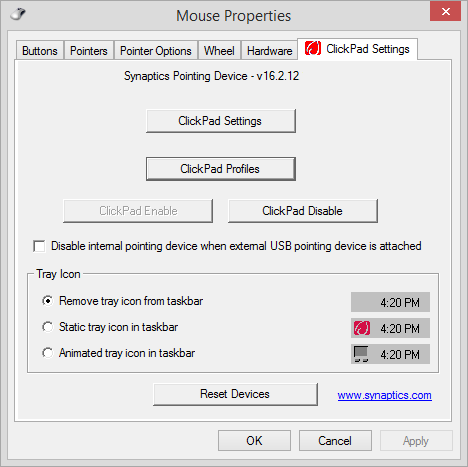
Switch to ELAN or Device Settings tab then uncheck “Disable internal pointing device when the external USB pointing device is attached” option.
Click Apply, followed by OK.
Method 3: Disable Dell Touchpad when Mouse is connected
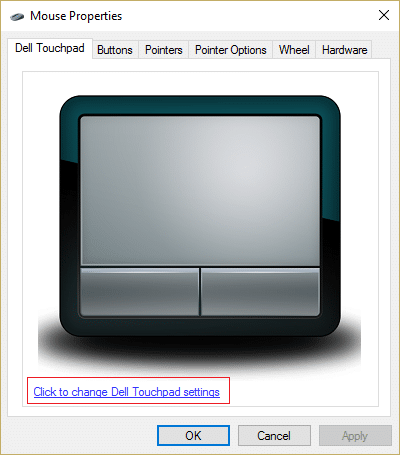
Press Windows Key + R then type main.cpl and hit Enter to open Mouse Properties.
Under Dell Touchpad tab, click on “Click to change Dell Touchpad settings“.
From Pointing Devices, select the Mouse picture from the top.
Checkmark “Disable Touchpad when USB mouse is present“.
Reboot your PC to save changes.
Method 4: Disable Touchpad when Mouse is connected via Registry
Press Windows Key + R then type regedit and hit Enter to open Registry Editor.
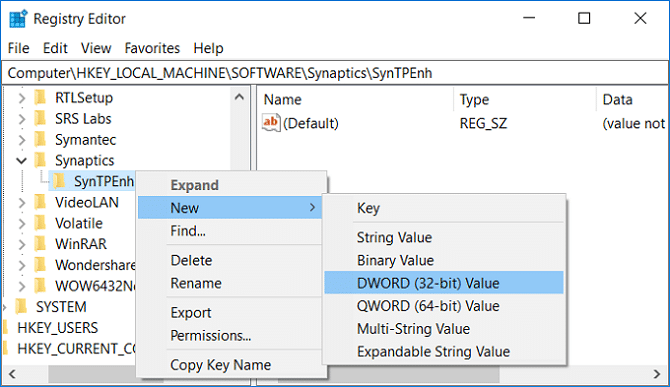
Navigate to the following registry key: HKEY_LOCAL_MACHINE\SOFTWARE\Synaptics\SynTPEnh
Right-click on SynTPEnh then select New > DWORD (32-bit) value.
Name this DWORD as DisableIntPDFeature and then double click on it to change its value.
Make sure that Hexadecimal is selected under Base then change its value to 33 and click OK.
Reboot your PC to save changes.
Method 5: Disable Touchpad when Mouse is Connected in Windows 8.1
Press Windows Key + C key to open Settings Charm.
Select Change PC settings than from the left-hand menu click on PC and Devices.
Then click on Mouse and Touchpad, then from the right window look for an option labelled as “Leave touchpad on when a mouse is connected“.
Make sure to disable or turn off the toggle for this option.
Reboot your PC to save changes, and this will automatically disable Touchpad when Mouse is connected. Recommended:
Completely uninstall Norton from Windows 10 How to Setup Remote Desktop Connection on Windows 10 Fix winload.efi missing or corrupt error How to completely uninstall McAfee from Windows 10
That’s it you have successfully Disable Touchpad when Mouse is Connected in Windows 10 but if you still have any queries regarding this guide then feel free to ask them in the comment’s section.


