The fix is simple you need to manually reinstall graphic card drivers but don’t be so sure that this will fix the issue. As different users have different PC configuration so you might need to try different methods in order to fix the issue. So without wasting any time let’s see how to actually Fix NVIDIA Control Panel Not Opening or Not Working issue with the help of below-listed troubleshooting guide.
Fix NVIDIA Control Panel Not Opening
Method 1: Update NVIDIA Graphics Card Driver
1.Press Windows Key + R then type devmgmt.msc and hit Enter to open Device Manager.
Fix NVIDIA Control Panel Not Opening Method 1: Update NVIDIA Graphics Card Driver Method 2: Make sure NVIDIA Display Driver Service is running Method 3: Uninstall NVIDIA Graphics Card Driver Method 4: Use Display Driver Uninstaller Method 5: Update .NET Framework and VC++ Redistributable Method 6: Set Highest Resolution Method 7: Registry Fix
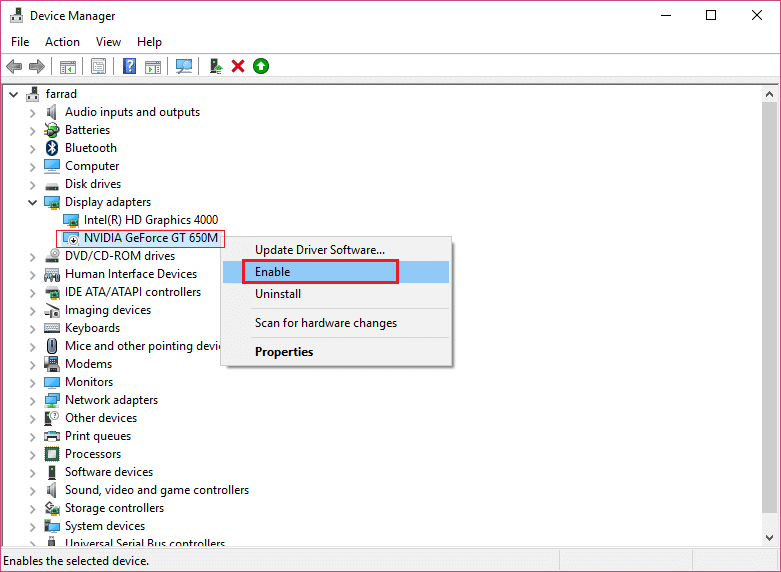
2.Next, expand Display adapters and right-click on your NVIDIA GeForce GT 650 M and select Enable.
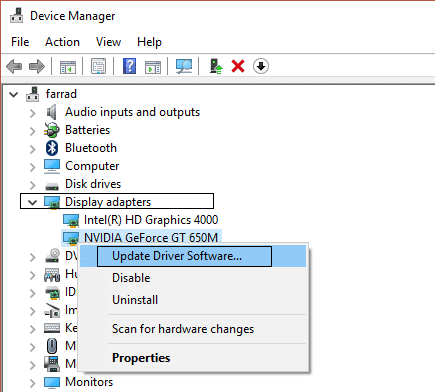
3.Once you have done this again right-click on your graphic card and select “Update Driver Software.“
4A.Select “Search automatically for updated driver software” and let it finish the process.
4B. If the above step was able to fix your problem then very good, if not then continue. Again select “Update Driver Software” but this time on the next screen select “Browse my computer for driver software.“
5.Now select “Let me pick from a list of device drivers on my computer.”
6.Finally, select the compatible driver from the list for yourNVIDIA Graphic Card and click Next. 7.Let the above process finish and restart your PC to save changes as you may be able to Fix NVIDIA Control Panel Not Opening issue.
Method 2: Make sure NVIDIA Display Driver Service is running
1.Press Windows Key + R then type services.msc and hit Enter.
2.Now find NVIDIA Display Driver Service then right-click on it and select Properties.
3.Make sure Startup type is set to Automatic and click Start if the service not already running. 4.Click Apply followed by OK. 5.Reboot your PC to save changes.
Method 3: Uninstall NVIDIA Graphics Card Driver
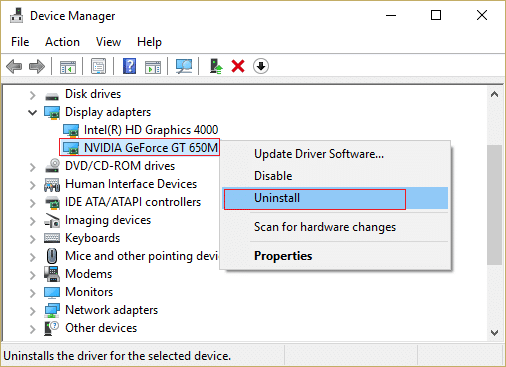
1.Right-click on your NVIDIA graphic card under device manager and select Uninstall.
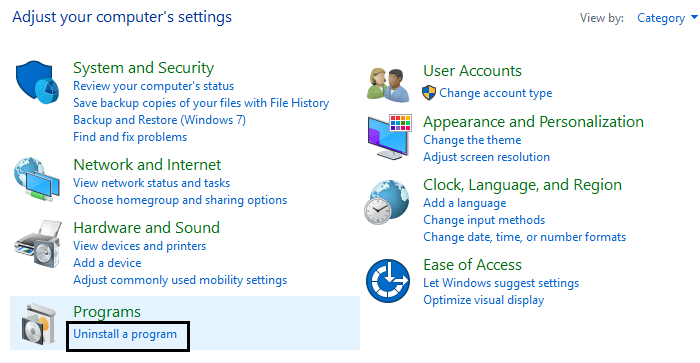
2.If asked for confirmation select Yes. 3.Press Windows Key + X then select Control Panel.
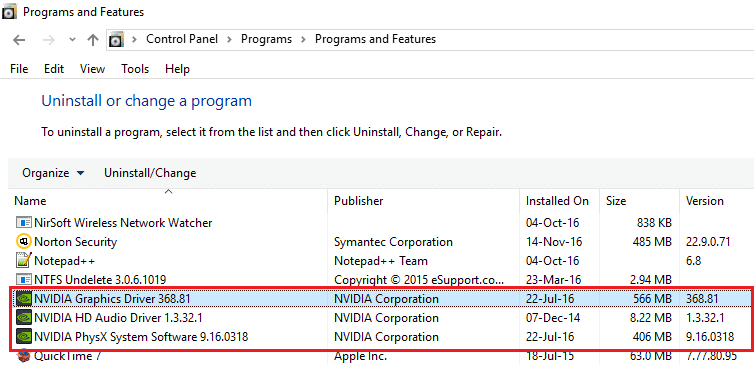
4.From Control Panel click on Uninstall a Program.
5.Next, uninstall everything related to NVIDIA.
6.Reboot your system to save changes and again download the setup from the manufacturer’s website. 7.Once you are sure that you have removed everything, try installing the drivers again. The setup should work without any problems.
Method 4: Use Display Driver Uninstaller
If nothing helps till now then you could use Display Driver Uninstaller to completely remove the graphic drivers. Make sure to boot into Safe Mode then uninstall the drivers. Then again restart your PC and install latest NVIDIA drivers from the manufacturer’s website.
Method 5: Update .NET Framework and VC++ Redistributable
If you don’t have latest NET Framework and VC++ Redistributable then it can cause problem of NVIDIA control panel missing because it runs applications on .NET Framework and VC++ Redistributable. Download latest .NET Framework Download latest VC++ Redistributable
Method 6: Set Highest Resolution
1.Right-click on Desktop in an empty area and select Display settings.
2.Make sure to set the Resolution to highest possible value, it would be indicated as recommended.
3.Reboot your PC to save changes and see if you’re able to Fix NVIDIA Control Panel Not Opening issue.
Method 7: Registry Fix
1.Press Windows Key + R then type regedit and hit Enter to open Registry Editor.
2.Navigate to the following registry key: HKEY_CLASSES_ROOT\Directory\Background\shellex\ContextMenuHandlers 3.Expand ContextMenuHandlers and find NvCplDesktopContext, then right-click on it and select Delete.
4.Now browse the following location: HKEY_CLASSES_ROOT\Directory\Background\shell 5.Right-click on Shell then select New > Key and name this key as NVIDIA Control Panel.
6.Next, Right-click on NVIDIA Control Panel then select New > Key and name this key as Command. 7. From Command folder in the right-hand pane, double click on Default value and set it’s value to C:\Windows\System32\nvcplui.exe then click OK.
8.Reboot your PC to save changes and then try to launch NVIDIA control panel. Recommended:
Fix Windows 10 Update Error 0x80070422 How To Fix Error 0x80004005 on Windows 10 How to create a password reset disk in Windows 10 Fix Windows Update Error 80070103
That’s it you have successfully Fix NVIDIA control panel not opening issue but if you still have any questions regarding this post then feel free to ask them in the comment’s section.