Sometimes this error gets solved automatically. However, when it starts occurring frequently, you should consider it as a serious problem. Now is the time when you need to find out the causes behind this problem and methods to solve this problem. Let’s start with figuring out what causes this error.
What are the causes of this problem? As per Microsoft, this problem occurs when your device requires a page from RAM memory or hard drive but did not get it. There are other causes such as faulty hardware, corrupted system files, viruses or malware, antivirus software, faulty RAM and a corrupted NTFS volume (Hard disk). This stop message occurs when the requested data is not found in the memory which means the memory address is wrong. Therefore, we will look into all probable solutions that can be implemented to solve this error on your PC.
Fix Page Fault In Nonpaged Area Error in Windows 10
Make sure to create a restore point just in case something goes wrong.
Fix Page Fault In Nonpaged Area Error in Windows 10 Method 1: Uncheck Automatically Manage Paging File Size For All Drives Method 2: Check Hard Drive for errors Method 3: Repair Corrupted Files on your system Method 4: Memory Error Diagnosis Method 5: Run System Restore Method 6: Check for System updates and Driver Updates Method 7: Run Driver Verifier Method 8: Run Automatic Repair
Method 1: Uncheck Automatically Manage Paging File Size For All Drives
It may be possible that Virtual memory causes this problem. 1.Right-click on “This PC” and select the Properties. 2.From the left panel, you will see Advanced System Settings, click on it
3.Go to the Advanced tab and then click on Settings under Performance option.
4.Navigate to the Advanced tab and click on the Change button. 5.Uncheck the “Automatically manage paging file size for all drives”, box and select “No paging file”. Further, save all settings and click on the OK button.
Restart your device so that changes can be applied to your PC. Surely, this will help you Fix Page Fault In Nonpaged Area Error on Windows 10. Hopefully, in the future, you will not receive a BSOD error on your PC. If you’re still facing the same problem, then you can proceed with another method.
Method 2: Check Hard Drive for errors
1.Open the Command Prompt with Administrator access. Type cmd on Windows search bar and then right-click on it and select Run as Administrator.
2.Here in the command prompt, you need to type chkdsk /f /r.
3.Type Y to start the process. 4.Next, run CHKDSK from here Fix File System Errors with Check Disk Utility(CHKDSK). 5.Let the above process complete and again reboot your PC to save changes.
Method 3: Repair Corrupted Files on your system
If any of the Windows files are corrupted, it can cause several errors on your PC including BSOD errors. Fortunately, you can easily scan and repair the corrupted files on your system. 1.Open the Command Prompt with Administrator access. Type cmd on Windows search bar and then right-click on it and select Run as Administrator.
2.Type sfc /scannow in command prompt.
3.Hit enter to start the command. Note: The above steps will take some time to get completed at the same time as your system scans and repairs corrupted files.
Method 4: Memory Error Diagnosis
1.Press Windows key + R and type mdsched.exe and hit enter.
2.In the next Windows dialogue box, you need to select Restart now and check for problems.
Method 5: Run System Restore
1.Press Windows Key + R and type”sysdm.cpl” then hit enter.
2.Select System Protection tab and choose System Restore.
3.Click Next and choose the desired System Restore point.
4.Follow the on-screen instruction to complete system restore. 5.After reboot, you may be able to Fix Page Fault In Nonpaged Area Error.
Method 6: Check for System updates and Driver Updates
This method includes diagnosing your system for the latest updates. It could be possible that your system is missing some important updates. 1.Press Windows Key + I to open Settings then click on Updates & Security.
2.Click on Check for Updates button.
3.Install any pending updates and reboot your PC.
Method 7: Run Driver Verifier
This method is only useful if you can log into your Windows normally not in the safe mode. Next, make sure to create a System Restore point.
Run Driver Verifier in order Fix Page Fault In Nonpaged Area Error. This would eliminate any conflicting driver issues due which this error can occur.
Method 8: Run Automatic Repair
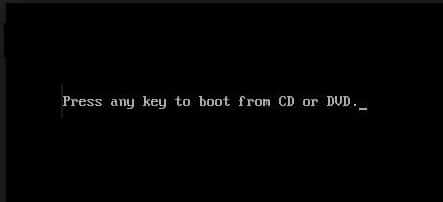
1.Insert the Windows 10 bootable installation DVD or Recovery Disc and restart your PC. 2.When prompted to Press any key to boot from CD or DVD, press any key to continue.
3.Select your language preferences, and click Next. Click Repair your computer in the bottom-left.
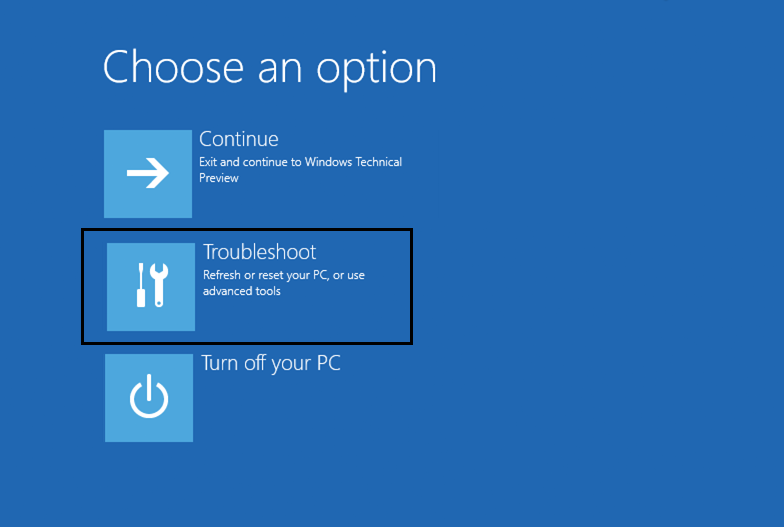
4.On choose an option screen, click Troubleshoot.
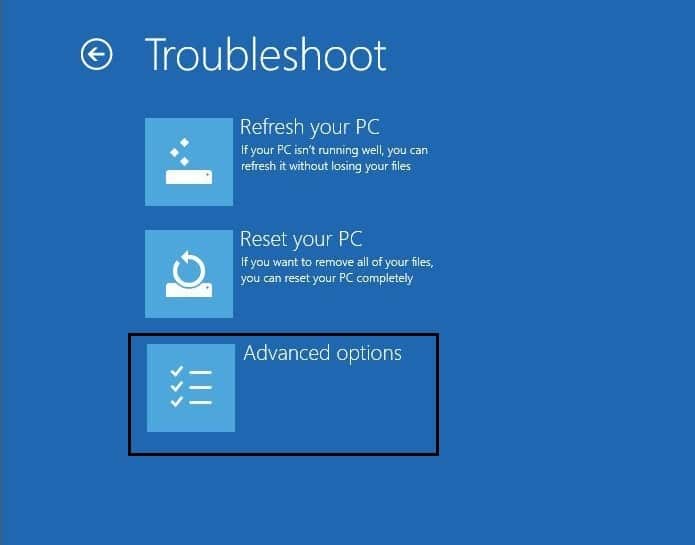
5.On Troubleshoot screen, click Advanced option.
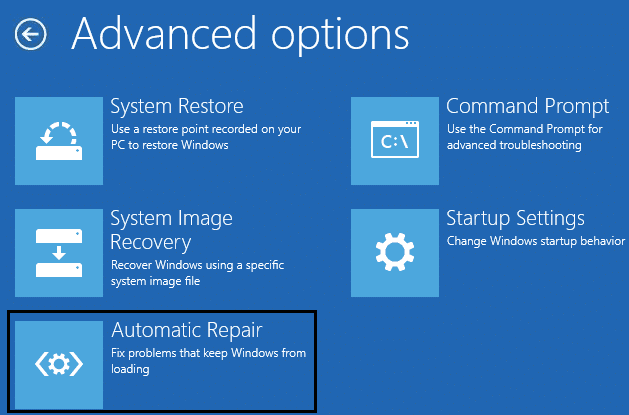
6.On the Advanced options screen, click Automatic Repair or Startup Repair.
7.Wait till the Windows Automatic/Startup Repairs complete. 8.Restart to save changes. Tip: One of the most important tips is that you should also uninstall or temporary stop the antivirus software on your systems. Many users reported that their Page Fault In Nonpaged Area Error in Windows 10 error is solved by disabling and uninstalling antivirus. Moreover, some users reported that they simply restore their system with the last working configuration. This could also be one of the best ways to get this problem solved. Recommended:
How to Fix Corrupted Outlook .ost and .pst Data Files Fix Enter Network Credentials Error on Windows 10 5 Best Video Editing Software For Windows 10 What is BIOS and how to update BIOS?
Overall, all of the above methods will help you Fix Page Fault In Nonpaged Area Error in Windows 10. However, you need to understand that not all BSOD errors can be solved by implementing above- mentioned methods, these methods are helpful for the Page Fault In Nonpaged Area Error in Windows 10 errors only. Whenever your blue screen shows this error message, you need to apply these methods only to resolve the error.


![]()


